Building your own PC can be one of the most rewarding tech experiences. Whether you’re aiming to create a powerful gaming machine, a reliable workstation, or a budget-friendly system, understanding the basics is essential. In this guide, we’ll walk you through what you need to know before you even start shopping for parts.
Why Build Your Own PC?
Building your own computer has several advantages:
- Customization: You choose exactly what goes into your PC.
- Cost-efficiency: You often get more power for your money.
- Upgrade flexibility: It’s easier to swap or upgrade parts over time.
- Satisfaction: It’s fulfilling to use a machine you built with your own hands.
However, before diving in, there are crucial points to understand.
Understand Your Needs
The first and most important step is knowing what you want to use your PC for. Here are a few common use cases:
- Gaming: Requires a strong GPU, high-refresh-rate monitor, and good cooling.
- Productivity: Focus on CPU, RAM, and storage.
- Media Editing: Powerful CPU, large RAM, GPU for rendering, and fast storage.
- Everyday Use: Basic CPU, integrated graphics, and moderate RAM.
Define your purpose clearly before buying parts—it will guide every choice.
Budget Planning
Set a realistic budget and stick to it. Don’t forget to include:
- All hardware parts
- Peripherals (monitor, keyboard, mouse)
- Operating system license
- Tools or accessories (screwdrivers, thermal paste)
- Surge protector or UPS
A common mistake is overspending on flashy parts and neglecting essential ones like the power supply.
Research Compatibility
One of the trickiest parts of building a PC is ensuring all components work together. Here are the key compatibility points:
CPU and Motherboard
- Check the CPU socket type (e.g., LGA1700 for Intel, AM5 for AMD).
- Verify chipset compatibility for features like overclocking or PCIe lanes.
RAM
- Ensure the RAM type (e.g., DDR4 or DDR5) matches the motherboard.
- Consider speed and capacity based on your use case.
GPU
- Check physical space in the case.
- Confirm the power supply wattage is sufficient.
Storage
- Know the difference between HDD, SATA SSD, and NVMe SSD.
- Ensure the motherboard has M.2 slots if using NVMe.
Power Supply
- Calculate your system’s wattage requirements.
- Choose a reputable brand with at least 80+ Bronze certification.
Case and Cooling
- Confirm motherboard size compatibility (ATX, Micro ATX, Mini ITX).
- Consider airflow, number of fans, and cable management space.
Choose Reputable Sources
Buy your parts from trusted retailers. Look for:
- Warranties and return policies
- Verified customer reviews
- Bundled deals to save money
Some users also explore second-hand markets, but caution is advised—test used components thoroughly.
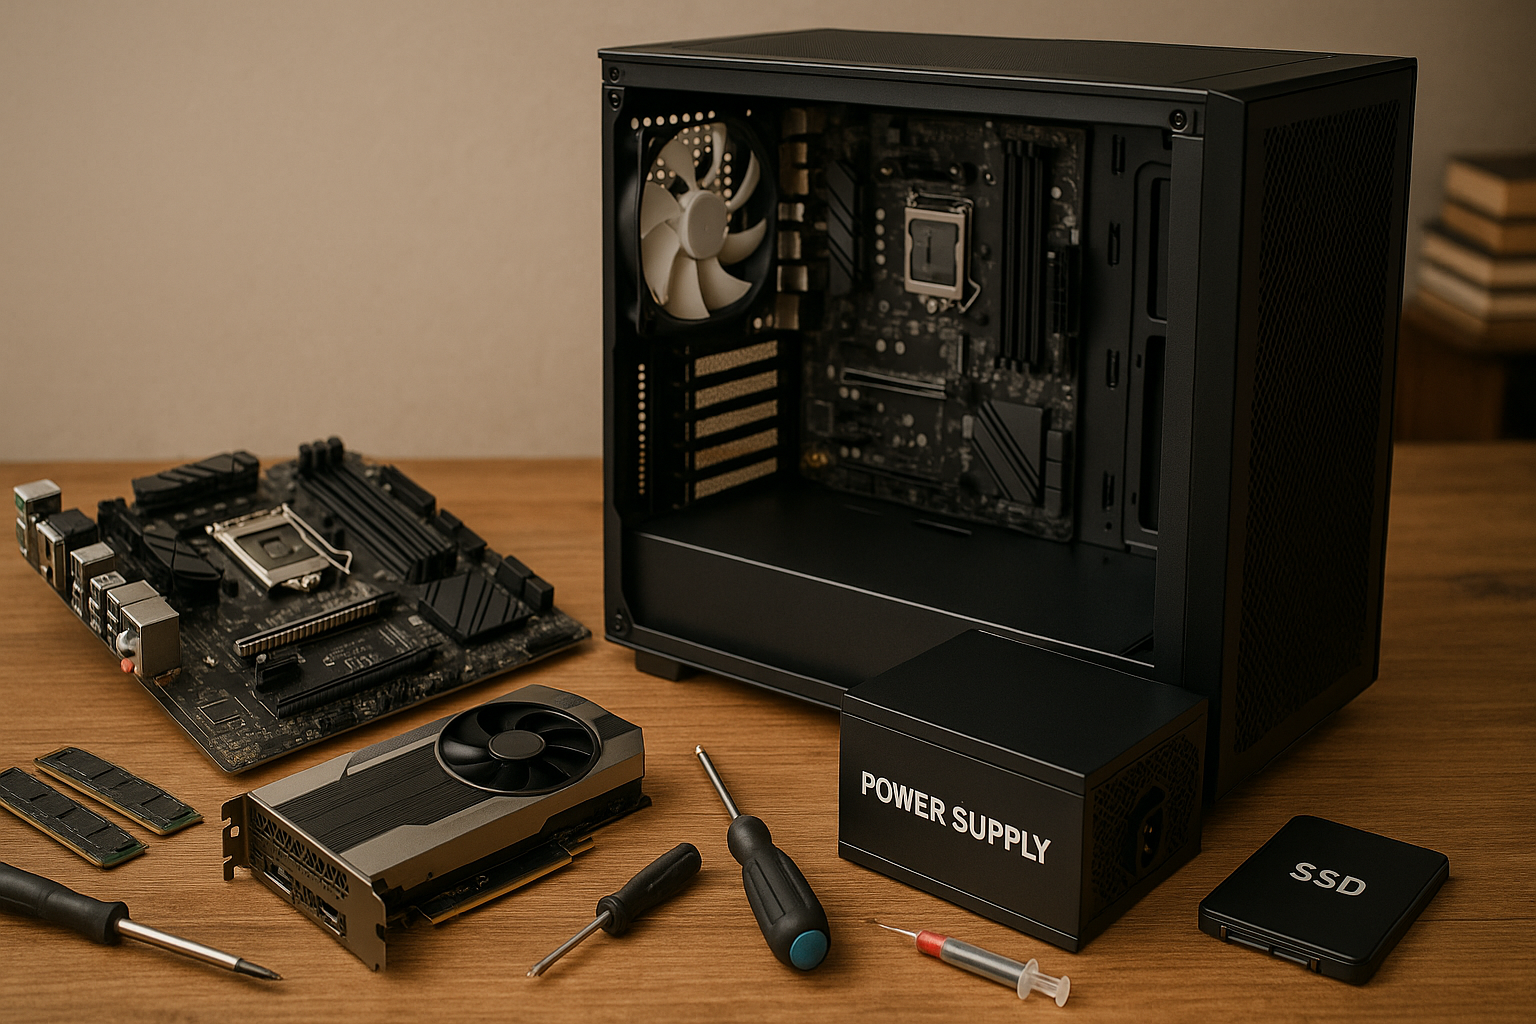
Learn the Basic Assembly Process
It’s a good idea to familiarize yourself with the step-by-step process before starting. This typically includes:
- Installing the CPU and RAM on the motherboard.
- Mounting the motherboard in the case.
- Connecting storage drives and GPU.
- Routing power cables and case connections.
- Booting and entering BIOS for initial setup.
Watching tutorials or reading guides with photos can make this process much easier.
Tools You’ll Need
You don’t need a full workshop, but a few essential tools help:
- Phillips screwdriver (#2 head)
- Anti-static wrist strap (optional but recommended)
- Thermal paste (some coolers come with it pre-applied)
- Cable ties for neat internal organization
Having a clean, well-lit space is also very helpful during assembly.
BIOS and Software Setup
Once the PC is assembled, the job isn’t done yet. You need to:
- Enter the BIOS/UEFI on first boot (usually by pressing DEL or F2).
- Update BIOS if needed.
- Set boot priority to install the OS.
- Install Windows, Linux, or another system.
- Download and install drivers for motherboard, GPU, and peripherals.
This step is essential to ensure everything runs smoothly.
Common Pitfalls to Avoid
Here are frequent mistakes first-time builders make:
- Forgetting standoffs under the motherboard
- Not connecting CPU power cable (separate from main 24-pin)
- Using incompatible RAM modules
- Not applying thermal paste or applying too much
- Connecting fans to the wrong headers
Always double-check everything before powering on.
Is It Difficult to Build a PC?
If you can follow instructions and take your time, building a PC is very manageable. No advanced technical skills are required. Most components are designed to fit only one way, which prevents errors. Many find it easier than they expected!
Final Thoughts: Start with Confidence
Building a PC isn’t just about saving money or getting more power—it’s a chance to understand and control your own technology. With preparation, research, and patience, even beginners can build a machine that lasts for years.
So, take your time, double-check everything, and enjoy the process. Your perfect PC is just a few screws away.